

How to Repair Roof Membrane
How to Repair Roof Membrane
Roof membrane repair is a crucial aspect of maintaining the integrity and longevity of your roof. In this comprehensive guide, we will delve into the intricate details of how to effectively repair roof membranes. Whether it's identifying areas of damage, gathering the necessary tools and materials, or executing the repair work with precision, this article will equip you with the knowledge and skills needed to tackle roof membrane repairs confidently. Follow our step-by-step instructions and expert tips to ensure a successful repair job that will protect your home for years to come.
Overview of Roof Membrane Repair
To effectively repair a roof membrane, understanding the basics of membrane repair is crucial. This overview will cover the importance of timely repairs to prevent extensive damage and the common causes that lead to roof membrane issues. By gaining insight into these key aspects, you'll be better prepared to inspect, prepare, and execute successful roof membrane repairs.
Importance of Timely Repairs
Timely repairs play a vital role in maintaining the structural integrity of your roof membrane. Addressing issues promptly can prevent minor problems from escalating into major costly repairs. By conducting regular inspections and addressing any signs of damage promptly, you can extend the lifespan of your roof membrane and avoid potential water damage to your property. Additionally, timely repairs help to ensure that your roof remains in optimal condition, providing reliable protection against the elements. Stay proactive and address roof membrane issues promptly to safeguard your property and enhance the longevity of your roofing system.
Common Causes of Roof Membrane Damage
Common causes of roof membrane damage can vary but often include factors such as extreme weather conditions like hail, heavy rainfall, or prolonged exposure to UV rays. Poor installation techniques or improper maintenance routines also play a significant role in weakening the membrane over time. Additionally, foot traffic, debris accumulation, and the growth of algae or mold can compromise the integrity of the membrane, leading to leaks and other issues. Understanding these common causes is essential for preventing damage and ensuring the longevity of your roof membrane.
Inspecting the Roof Membrane
Inspecting the roof membrane is a critical step in the repair process. By carefully assessing the membrane's condition, you can identify areas of damage that require attention. This inspection involves a thorough examination of the membrane surface to pinpoint tears, punctures, or other forms of damage. Additionally, having the necessary tools and equipment ready for inspection will streamline the process and help you prepare for the subsequent repair work. By understanding how to conduct a comprehensive inspection, you lay the groundwork for successful roof membrane repairs that address all identified issues effectively.
Identifying Areas of Damage
Identifying areas of damage on your roof membrane is a crucial step in the repair process. Start by visually inspecting the surface for any signs of wear, cracks, or tears. Pay close attention to areas where water may pool or where seams are located, as these are common trouble spots. Use a light and inspect the membrane during daylight hours to check for any visible damage. Additionally, look for signs of mold or mildew growth, which can indicate moisture penetration. By thoroughly examining your roof membrane, you can pinpoint areas in need of repair and take proactive steps to address them effectively.
Necessary Tools and Equipment
When preparing for roof membrane repair, having the right tools and equipment is essential for a successful job. Some necessary items to have on hand include safety gear such as gloves, goggles, and a hard hat to protect yourself during the repair process. Additionally, tools like a utility knife, measuring tape, and a heat gun can aid in cutting and sealing the membrane effectively. It's also important to ensure you have the appropriate repair materials, such as membrane patches, adhesives, and waterproof sealants, to address various types of damage. By having the necessary tools and equipment ready before beginning the repair work, you can work efficiently and responsibly to restore the roof membrane to its optimal condition.
Preparing for Repair Work
Preparing for repair work is a crucial aspect of ensuring a successful roof membrane repair project. This stage involves cleaning and preparing the work area to create a safe and optimal environment for carrying out the repairs. By removing debris, dirt, and any obstructions from the work area, you set the stage for a more efficient repair process. Additionally, gathering the necessary materials for the repair, including membranes, adhesives, and other tools, is essential to prevent delays and ensure a seamless repair workflow. Proper preparation sets the foundation for a well-executed repair job that addresses the identified issues effectively and efficiently.
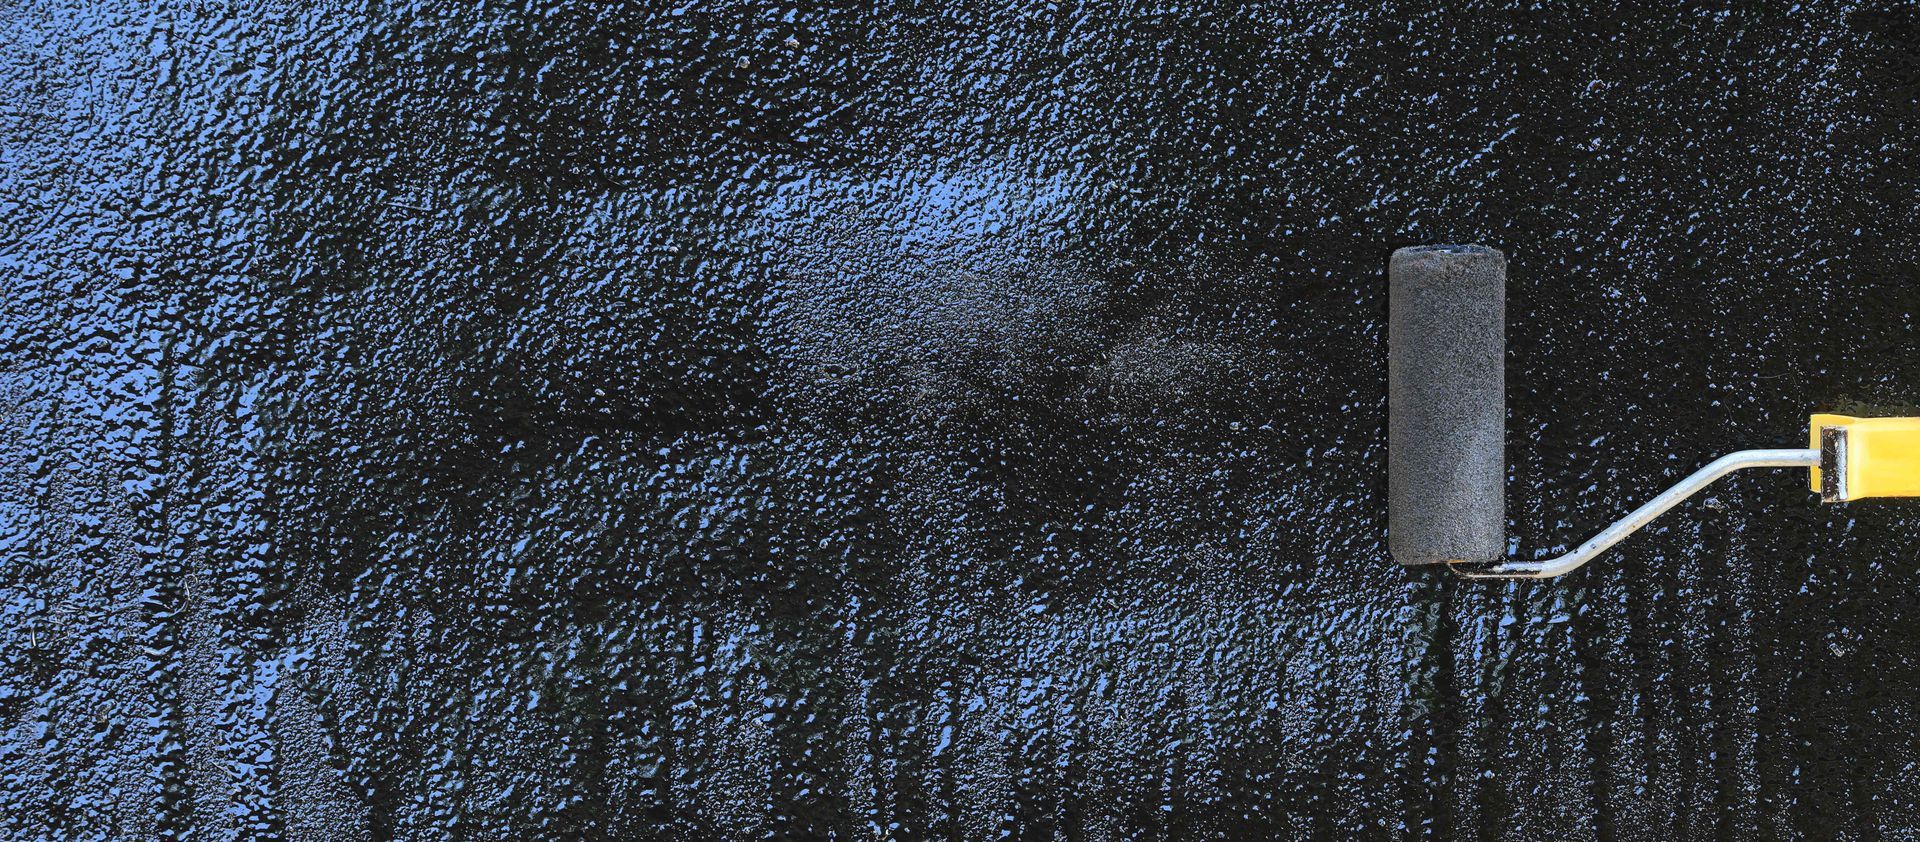
Cleaning and Preparing the Work Area
Cleaning and preparing the work area before repairing your roof membrane is essential to ensure a smooth and effective repair process. Start by removing any debris, dirt, or loose materials from the roof surface using a broom or a leaf blower. Thoroughly clean the area around the damaged section to create a clean workspace for the repair work. Additionally, make sure to secure any loose objects or equipment that could pose a safety hazard during the repair process. By properly cleaning and preparing the work area, you can work more efficiently and effectively, ultimately achieving a successful roof membrane repair.
Gathering Materials for Repair
Gathering the necessary materials for roof membrane repair is a crucial step in the process. You will need membrane patches, adhesives, and waterproof sealants to effectively address different types of damage. Additionally, consider having a utility knife, measuring tape, and a heat gun on hand to assist in cutting and sealing the membrane. By ensuring you have all the required materials ready before starting the repair work, you can work efficiently and effectively to restore the roof membrane to its optimal condition.
Repairing Roof Membrane Damage
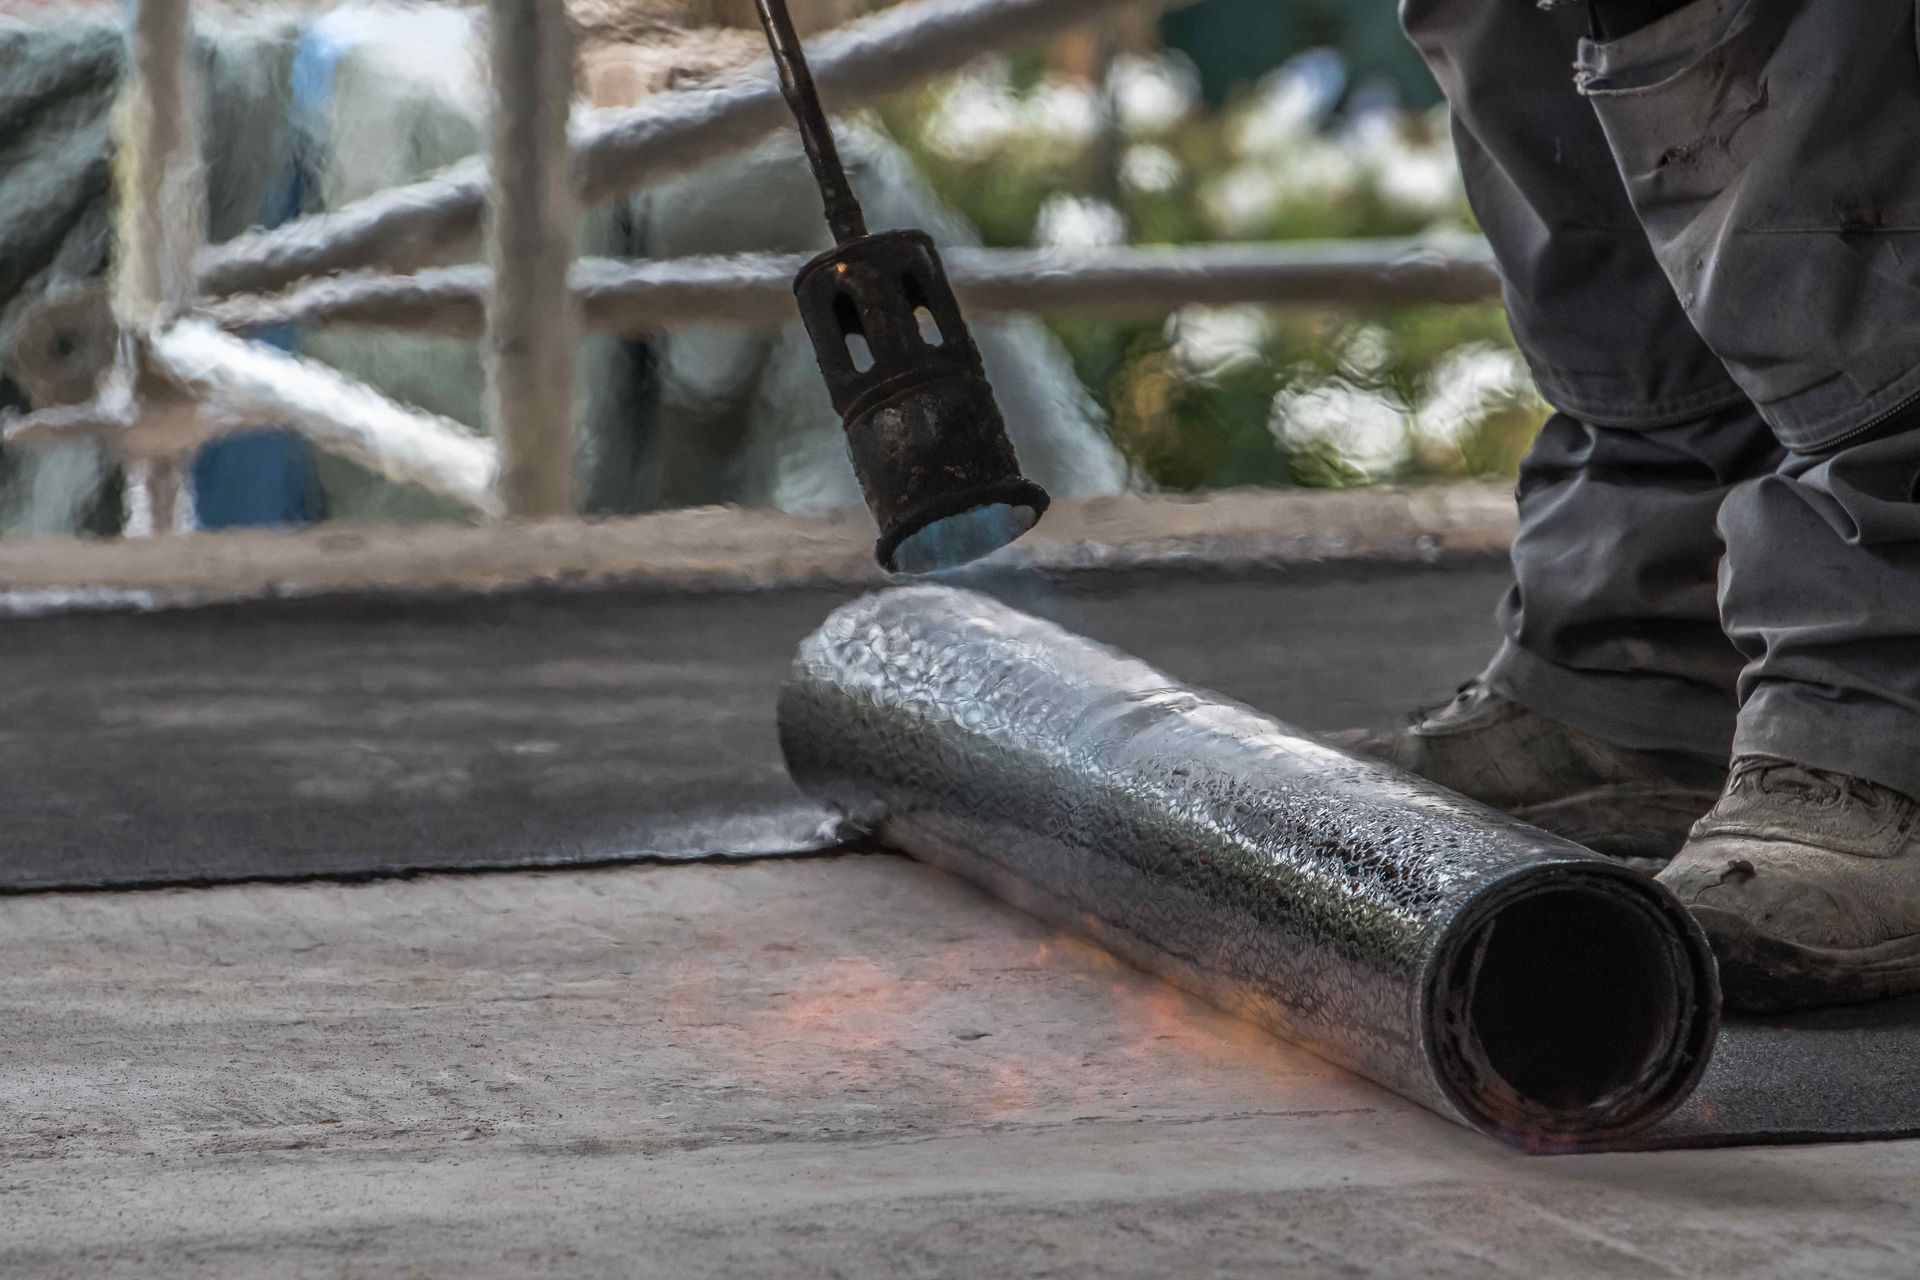
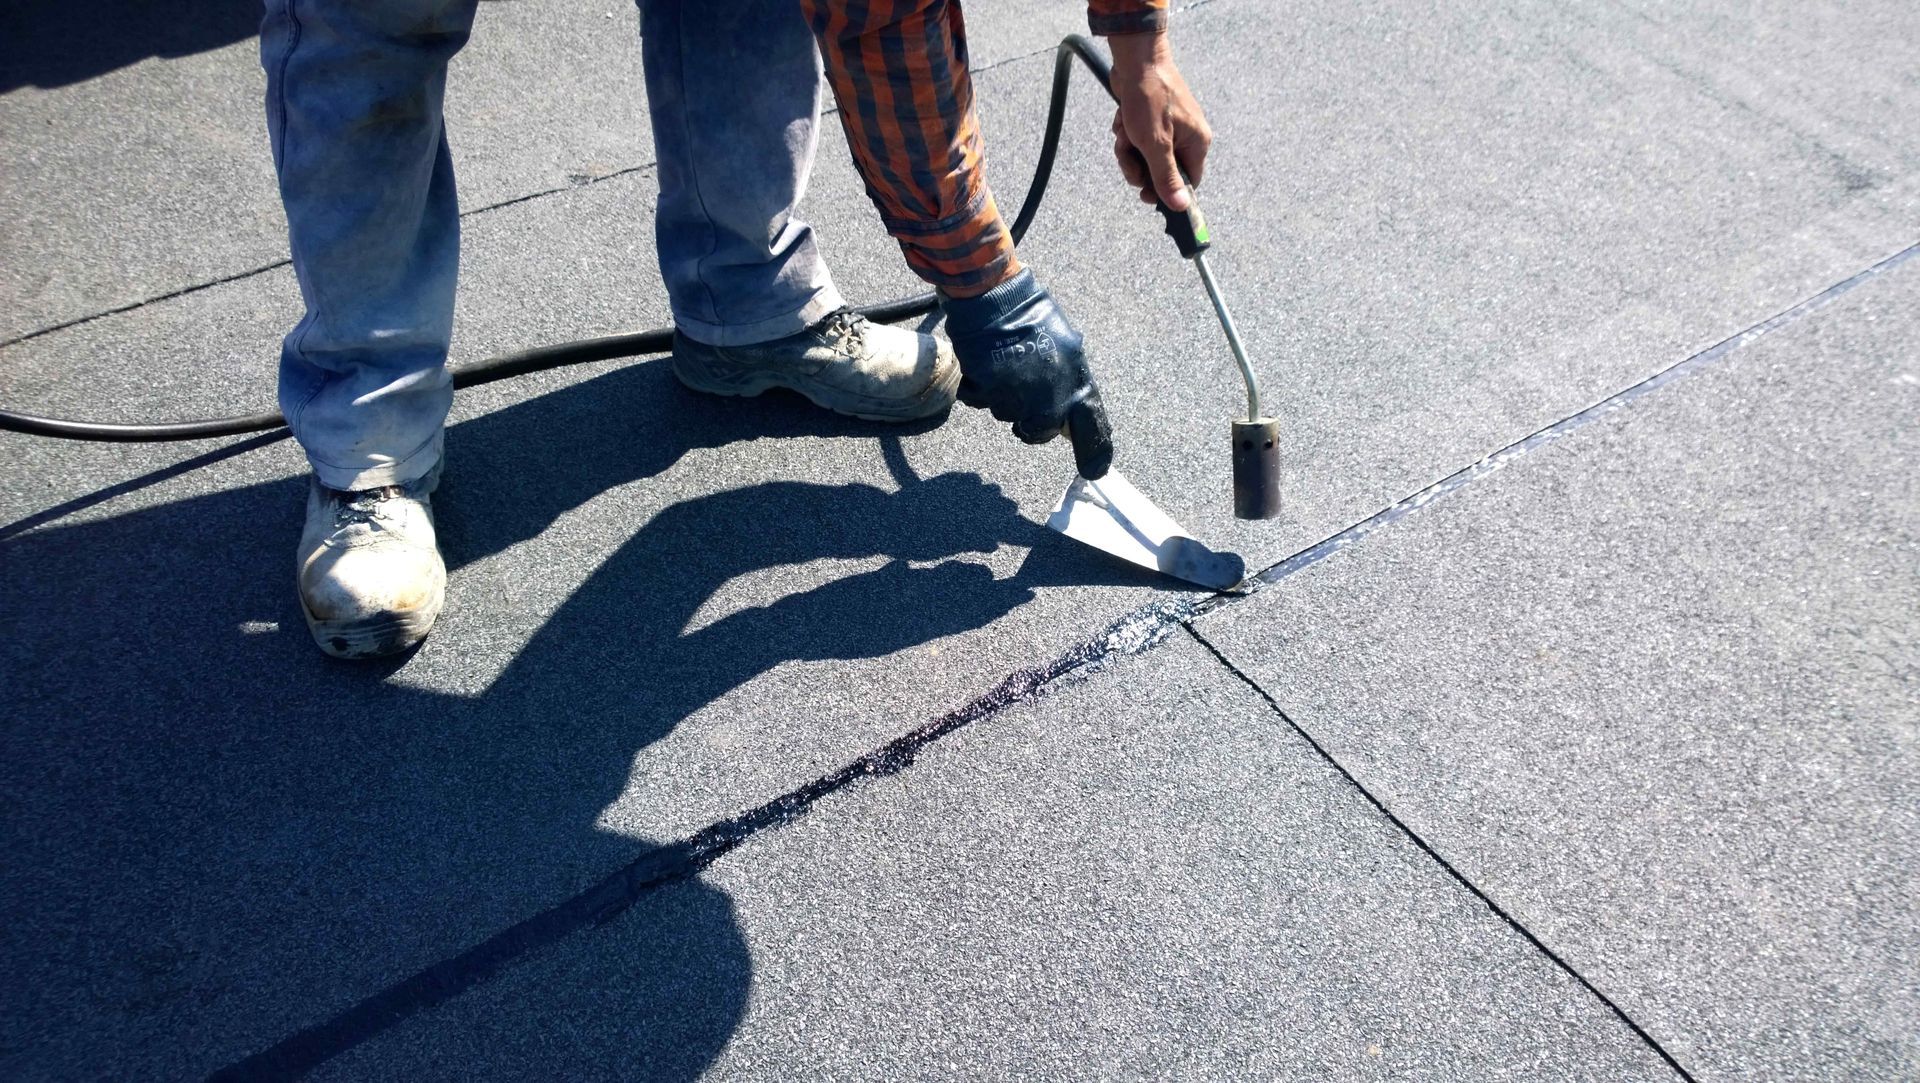
Repairing roof membrane damage is a critical task that involves addressing identified issues effectively. Depending on the extent of the damage, repairs may include patching small tears and holes or replacing damaged sections entirely. To patch small tears and holes, you will need to clean the area thoroughly, apply an appropriate sealant or patching material, and ensure a secure bond to prevent further leakage. For more extensive damage where sections need replacement, careful removal of the damaged area and proper installation of a new membrane are essential to restore the roof's integrity. By following the proper techniques and using high-quality materials, you can successfully repair roof membrane damage and extend the life of your roofing system.
Patching Small Tears and Holes
Patching small tears and holes in the roof membrane is a crucial aspect of the repair process. These minor damages can lead to more significant issues if left unaddressed, making timely patching essential. To patch small tears and holes effectively, start by cleaning the damaged area to ensure proper adhesion. Use a suitable adhesive or patch material designed for roof membranes and carefully apply it over the damaged area, smoothing out any air bubbles to create a secure seal. Properly patched tears and holes will help maintain the integrity of the roof membrane and prevent water infiltration, ultimately prolonging the life of your roof.
Replacing Damaged Sections
When it comes to repairing roof membrane damage, sometimes patching small tears and holes may not suffice. In cases where sections of the membrane are extensively damaged or beyond repair, replacing those sections becomes necessary. This process involves carefully cutting out the damaged portion of the membrane and securely installing a new piece in its place. It's essential to ensure the replacement section is properly sealed and adhered to the surrounding membrane to maintain the integrity of the roof's waterproofing. By addressing severely damaged sections through replacement, you can effectively restore the roof membrane's protective function and prolong the lifespan of the entire roofing system.
Testing and Inspecting Repairs
After completing the repair work on the roof membrane, it is essential to test and inspect the repairs to ensure that they have been executed effectively. Testing the repairs involves checking for proper adhesion of patch materials, secure seals on repaired areas, and overall waterproofing integrity. Inspecting the repairs also includes looking for any signs of potential future issues or areas that may require additional attention. By thoroughly testing and inspecting the repairs, you can confirm that the roof membrane is in good condition and that the repair work has been successful. This final step in the repair process helps maintain the longevity and functionality of the roof membrane, providing peace of mind knowing that the necessary repairs have been carried out accurately.
Ensuring Proper Seal and Waterproofing
Ensuring a proper seal and waterproofing are essential steps in roof membrane repair to prevent future water damage and maintain the integrity of your roof. After completing the repair work, carefully inspect the patched or replaced areas to ensure they are securely sealed. Test the repaired sections by applying water and checking for any signs of leakage. Additionally, consider applying a waterproof sealant over the repaired areas to enhance their protection against water infiltration. By taking these extra steps to ensure a proper seal and waterproofing, you can increase the longevity of your roof membrane and protect your building from potential water-related issues.
Post-Repair Maintenance Tips
After completing roof membrane repairs, it's important to implement post-repair maintenance practices to ensure the longevity and effectiveness of the work done. Here are some essential post-repair maintenance tips to follow:1. Regular Inspections: Schedule periodic inspections to check the condition of the repaired areas as well as the overall roof membrane. Early detection of any issues can prevent bigger problems in the future.2. Keep the Roof Clean: Regularly remove debris such as leaves, branches, and other materials from the roof surface. Accumulated debris can promote moisture retention and potentially lead to damage.3. Address Issues Promptly: If you notice any new damage or signs of water infiltration, address them promptly to prevent further damage to the roof membrane and the underlying structure.4. Monitor for Leaks: Keep an eye out for signs of leaks, such as water stains on ceilings or walls. Quickly identifying and repairing leaks can prevent significant water damage.5. Maintain Gutters and Drains: Ensure that gutters and drainage systems are clear of debris to allow proper water flow off the roof. Clogged gutters can lead to water pooling on the roof, increasing the risk of damage.6. Trim Overhanging Branches: Trim back any tree branches that overhang the roof to prevent them from scraping or damaging the membrane during windy conditions.7. Contact Professionals for Complex Issues: For complex repairs or maintenance tasks that require specialized knowledge or equipment, consult with professional roofing contractors to ensure the job is done correctly and effectively.By following these post-repair maintenance tips, you can help prolong the lifespan of your roof membrane and ensure that your roofing system continues to provide reliable protection for your property.
Quick & Reliable roof repair and installation Savannah Georgia
Ready to secure your property with top-tier roofing? Contact us today for reliable solutions that stand the test of time—your trusted Savannah roofing partner – Top Roof.
Navigation
Working hours
- Mon - Fri
- -
- Saturday
- -
- Sunday
- Closed
Powered by: WebPro.ai